
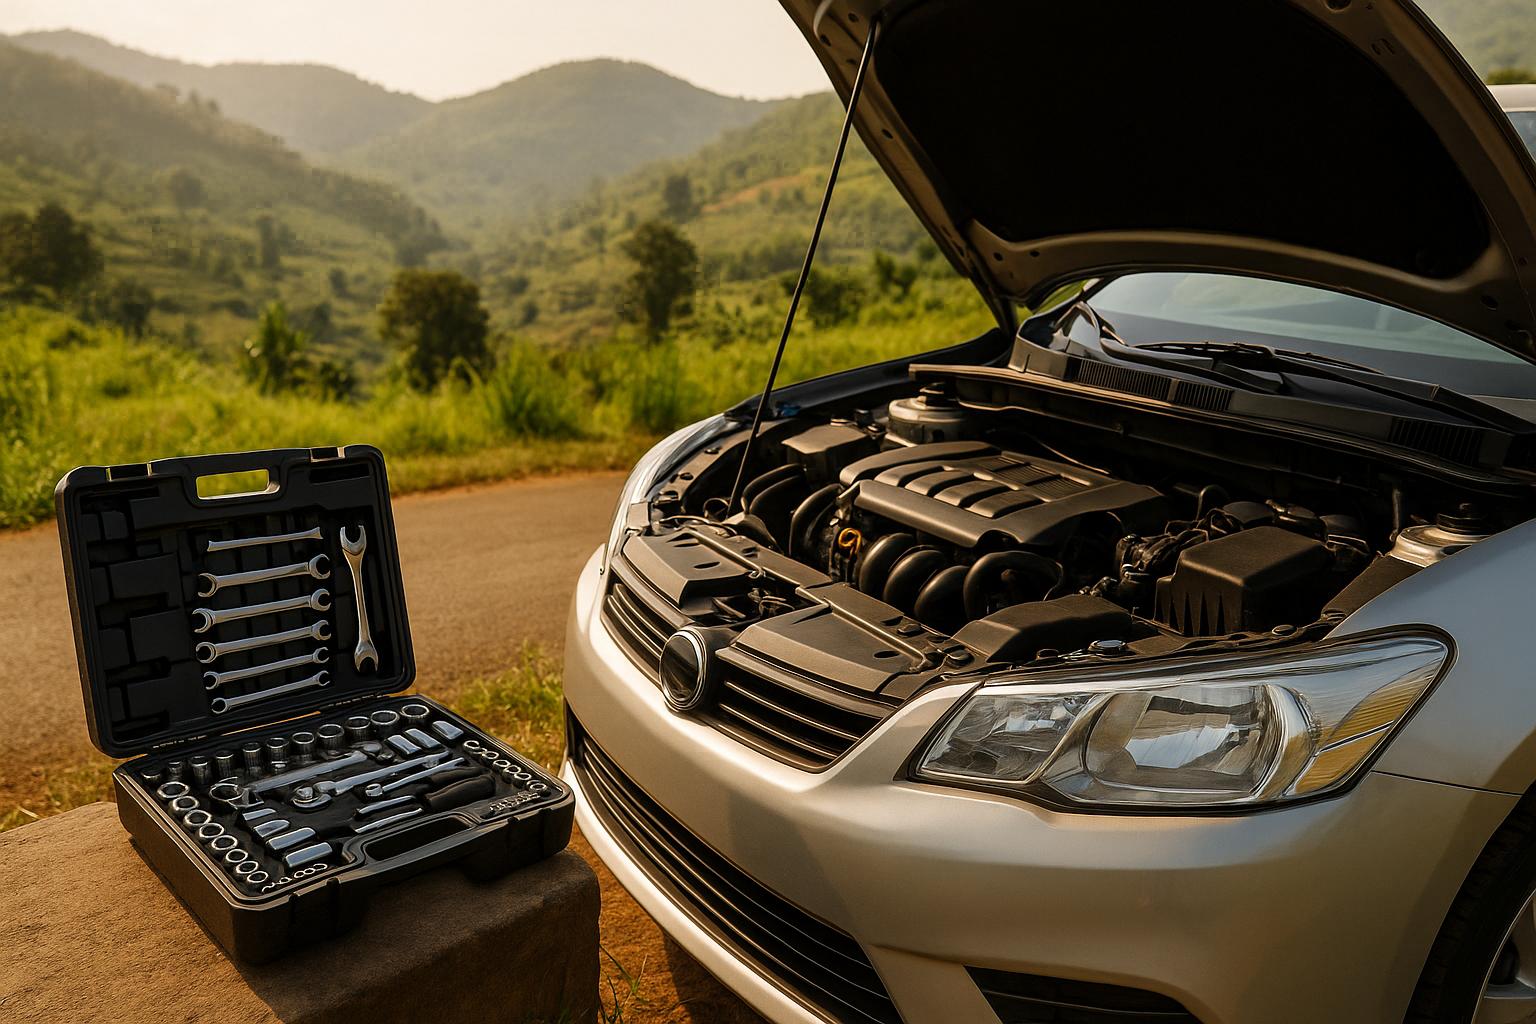
Owning a car in Uganda means dealing with challenging road conditions, from unpaved trails to unpredictable weather. Regular monthly maintenance ensures your vehicle stays safe, efficient, and reliable. Here’s a quick checklist to keep your car in top shape:
- Engine Oil: Check the level and condition to prevent overheating or engine failure. Change it more often if driving on dusty roads or in heavy traffic.
- Tires: Maintain correct pressure and inspect treads for wear or damage. Adjust PSI based on road conditions.
- Brakes: Inspect pads, rotors, and fluid. Look out for noises, vibrations, or warning lights.
- Battery: Clean terminals, test voltage, and replace if older than three years.
- Fluids: Monitor coolant, brake fluid, transmission fluid, and washer fluid. Top up or replace as needed.
- Lights: Test all bulbs and indicators monthly. Replace faulty bulbs promptly.
- Air Filter: Check for dirt or blockages. Replace every 30,000–45,000 miles or sooner if driving in dusty areas.
- Wipers: Inspect blades for wear. Replace every 6–12 months and keep washer fluid full.
- Belts and Hoses: Look for cracks, fraying, or leaks. Replace worn parts to avoid breakdowns.
- Cleaning: Wash the exterior to prevent corrosion and clean the interior to maintain comfort and value.
Pro Tip: Spending 30 minutes a month on these checks can save you money on repairs and keep you safe on Uganda’s tough roads. Regular maintenance isn’t just smart – it’s essential for your safety and your car’s longevity.
Are You Doing These Essential Daily Weekly & Monthly Driver Checks To Avoid Breakdowns.
1. Engine Oil Level and Condition
Engine oil plays a crucial role in keeping your engine running smoothly, especially under Uganda’s challenging driving conditions. From dusty roads to constant stop-and-go traffic, your engine relies on oil to reduce friction, prevent overheating, and avoid costly repairs.
Skipping regular oil checks can lead to increased friction, overheating, and even engine failure.
How to Check and Add Engine Oil
Checking your oil level is a straightforward process that only takes a few minutes. Start by parking your vehicle on a level surface and ensuring the engine is turned off. Pull out the dipstick, wipe it clean, reinsert it fully, then remove it again to check the oil level. The oil should ideally be near the "full" mark. If it’s below the minimum line, it’s time to add more.
To add oil, unscrew the oil filler cap and pour in small amounts – no more than half a quart at a time. After each addition, recheck the level to avoid overfilling, which can cause its own set of problems.
"Checking your fluid levels is one of the simplest yet most important bits of car maintenance you can do to help you avoid a breakdown." – RAC Drive
Don’t just stop at the level – keep an eye on the oil’s condition, as this can indicate when it’s time for a change.
When Oil Needs Changing
Fresh engine oil is golden and flows easily. If the oil appears dark, gritty, or contaminated, it’s a clear sign it needs to be replaced.
Also, pay attention to how your engine is performing. Warning signs like unusual noises, dashboard alerts, excessive exhaust smoke, oil puddles under your car, or reduced fuel efficiency could mean your oil isn’t doing its job.
Generally, oil changes are recommended every 3,000 to 5,000 miles. Newer cars might stretch this interval to around 6,000 miles or six months. However, Uganda’s tough driving conditions – like dusty roads and heavy traffic – may require you to change the oil more frequently. If you notice you’re adding oil often between changes, it could signal a leak or internal engine wear. In such cases, consult a professional to diagnose the issue early and avoid severe engine damage.
2. Tire Pressure and Tread Condition
Taking care of your tires is essential for staying safe, saving fuel, and getting the most out of your tires – especially on Uganda’s challenging roads. Potholes, gravel, and uneven surfaces can take a toll on your tires, so keeping them in good shape is a must. One easy way to start? Check your tire pressure every month. This simple habit can improve fuel efficiency, make your ride smoother, and extend the life of your tires.
Driving with the wrong tire pressure – whether too low or too high – can lead to uneven tread wear, increase the risk of tire failure, and even waste fuel. Plus, it shortens the lifespan of your tires. Let’s dive into how to check and adjust tire pressure the right way.
Checking and Adjusting Tire Pressure
Your vehicle’s manufacturer provides a recommended PSI (pounds per square inch) for your tires, which applies to "cold" tires – those that haven’t been driven for at least three hours or have been driven less than a mile at a moderate speed. You can usually find this information on a sticker inside the driver’s side door jamb or in your owner’s manual.
To check your tire pressure, you’ll need a tire pressure gauge and access to an air compressor. Here’s how to do it:
- Remove the valve cap on the tire.
- Press the gauge firmly onto the valve stem until the hissing sound stops, then check the reading.
- Compare the reading to the recommended PSI for your vehicle.
If the pressure is too low, use an air compressor to inflate the tire to the correct PSI. If it’s too high, release some air to adjust. Once you’re done, don’t forget to replace the valve cap.
For Uganda’s rough roads, you may need to tweak your approach based on the terrain. For rocky surfaces, aim for 25–30 PSI to reduce the risk of punctures. On hard-packed off-road conditions, 20–25 PSI might work better. However, avoid extremely low pressures, as they can cause the tire to separate from the rim.
"Using the recommended tyre pressure is crucial to improving your vehicle performance, preventing damage to the tyres, maximising your tyre’s lifespan, and helping you enjoy a safe, smooth ride." – Alex Coughlan, Owner and Founder of Elite Tune
Once your tires are properly inflated, it’s time to inspect the tread for added safety.
Looking at Tire Tread and Damage
Your tire’s tread depth plays a big role in keeping you safe, especially during Uganda’s rainy seasons when roads can get slippery. Tires should be replaced when the tread depth reaches 4/32nds of an inch, as stopping distances increase significantly at this point. In fact, worn tires in wet conditions can increase stopping distances by as much as 43%.
A quick way to check tread depth is the quarter test. Insert a quarter into the tread with Washington’s head facing down. If the top of his head is visible, it’s time to replace the tire. Legally, tires are considered worn out when the tread depth is 2/32" or less.
But tread depth isn’t the only thing to watch. Look for cracks, bulges, or cuts on the sidewalls – these are signs that your tire needs immediate replacement. Uneven tread wear could indicate alignment or suspension problems, which can reduce tire life by up to 30%. Addressing these issues early can save you money in the long run.
Pay attention to how your car feels on the road. If you notice unusual vibrations or the car pulling to one side, it might be a sign of tire issues that require professional attention. According to the National Transportation Safety Board, tire-related crashes result in about 33,000 accidents annually, with at least 2,000 caused by blowouts.
Most tire manufacturers recommend replacing tires every six years, regardless of how many miles they’ve been driven. You can check the manufacture date on the sidewall of your tire – it’s a four-digit code where the first two digits represent the week and the last two the year.
Lastly, regular tire rotation – every 5,000 to 8,000 miles – helps ensure even wear and extends the life of your tires. Given the tough road conditions in Uganda, this step is especially important to maximize the value of your tires.
3. Brake System Check
Keeping your brakes in top shape is a crucial part of staying safe on the road, especially when navigating Uganda’s unpredictable driving conditions. Regular brake system checks can help you avoid costly repairs and, more importantly, prevent accidents. A quick monthly inspection can make all the difference between a smooth stop and a dangerous situation.
The good news? You can perform basic brake inspections yourself without needing any special tools. Most brake components are visible through the wheel spokes, making the process simple and efficient.
Checking Brake Pads and Rotors
Brake pads naturally wear down over time, but keeping an eye on their condition is essential. You can usually see the brake pads through your wheel spokes – use a flashlight if needed.
Brake pad thickness is a key safety factor. Pads should be at least 1/4 inch (6.35 mm) thick. If they’re thinner than this, it’s time to replace them. Also, check the wear indicator slot on the brake pad. If the slot is barely visible or completely gone, the pads need immediate replacement. Many cars are equipped with dashboard warning lights that alert you when the pads are worn down.
Rotors, which work alongside the pads, also need regular inspection. Run your fingers along the rotor’s surface to feel for grooves or irregularities. Look for cracks, deep grooves, uneven wear, or a noticeable lip on the edge of the rotor – all signs of significant wear. Heat spots on the rotor can indicate uneven brake pad deposits, which should also be addressed.
Once you’ve checked the physical condition of the components, pay attention to any operational warning signs your car might be giving you.
Recognizing Brake Problems
Your car often gives you early warnings when there’s an issue with the brakes. Catching these signs early can save you from costly repairs and dangerous situations.
Noises are often the first clue. Squealing or squeaking sounds usually mean your brake pads are wearing thin or need cleaning. Grinding noises are more serious – they indicate severely worn pads that need immediate replacement.
"Brakes in good condition can be the difference between a close call and an unfortunate incident." – Patrick Haley, Nubrakes Operations Manager
Changes in pedal feel are another red flag. If the brake pedal feels soft or spongy, it could mean there’s air in the brake lines or a fluid leak. A sinking pedal that moves toward the floor under steady pressure is a sign of a serious issue requiring professional attention.
Vehicle behavior can also reveal brake problems. If your car pulls to one side when braking, it might be due to uneven brake pad wear or a stuck caliper. Vibrations while braking often point to warped rotors that need resurfacing or replacement.
| Warning Sign | What It Means | What to Do |
|---|---|---|
| Squealing/Squeaking | Worn brake pads or dirty brakes | Replace pads or clean brakes |
| Grinding sounds | Severely worn pads or debris | Replace pads immediately; remove debris |
| Soft/spongy pedal | Air in brake lines or fluid leak | Bleed brakes; repair leaks |
| Vibration when braking | Warped rotors | Resurface or replace rotors |
| Car pulls to one side | Uneven pad wear or stuck caliper | Replace pads; service caliper |
| Brake warning light | Low fluid, worn pads, or ABS issue | Check fluid; consult a mechanic |
Other warning signs include burning smells, which might indicate overheated brakes or a stuck caliper. If you notice smoke coming from a wheel, pull over safely and allow the brakes to cool. Leaking brake fluid is another serious issue – it appears as clear, yellow, or brown puddles under the car and requires immediate attention.
Brake fluid monitoring is also critical. Check the brake fluid reservoir every month to ensure levels are adequate. Examine the fluid itself – it should be clear or light amber. If it’s dark brown or black, it’s contaminated and needs replacing. Low brake fluid can lead to reduced braking efficiency, longer stopping distances, and even total brake failure.
Brake problems don’t fix themselves and tend to get worse over time. Address any warning signs promptly to ensure your safety and that of your passengers on Uganda’s roads.
4. Battery Health and Connections
Your car’s battery is like its heartbeat, especially in Uganda’s challenging conditions. Without it, you might find yourself stuck in remote areas or caught off guard during heavy rains. Spending just a few minutes each month checking your battery can save you from costly repairs and inconvenient breakdowns. Like oil changes or brake maintenance, paying attention to your battery ensures your vehicle stays reliable.
Uganda’s climate, with its temperature extremes, can be tough on batteries. Regular inspections help catch potential issues early, preventing the frustration of a dead battery when you least expect it.
Checking Terminals and Removing Corrosion
One common issue with car batteries is corrosion, which shows up as a white, blue, or greenish crust around the battery posts, terminals, or cables. While it might look harmless, this buildup can interfere with your car’s performance.
"Corrosion is a poor conductor of energy, so if it’s allowed to build up, the battery can’t function as it should." – Jiffy Lube
Corrosion can lead to problems like slow engine cranking, dim headlights, and difficulty starting your car. Cleaning it off is straightforward, but safety should always come first.
Wear safety goggles and rubber gloves when working with your battery, as the acid can cause serious burns. Start by disconnecting the battery cables, removing the negative cable first to avoid electrical sparks.
To clean the terminals, mix a tablespoon of baking soda with a cup of water. This solution neutralizes the battery acid and helps remove corrosion. Alternatively, you can use a commercial battery terminal cleaner. Apply your cleaning solution to the corroded areas and scrub gently with a battery brush, wire brush, or even a stiff toothbrush. You’ll notice a fizzing reaction as the baking soda works to neutralize the acid. Once clean, rinse the terminals with water and dry them thoroughly.
To prevent future corrosion, apply a layer of battery terminal grease or install felt washers after cleaning. These simple steps can help protect your battery in Uganda’s humid environment. If the corrosion is severe and has damaged the metal, it’s best to replace the affected terminals entirely. Once the terminals are clean, you can test your battery to confirm it’s functioning properly.
Testing Battery Power
A visual inspection only tells part of the story. Testing your battery’s voltage gives you a clearer picture of its health and remaining lifespan. You can use a multimeter, which costs as little as $13, to perform these tests.
There are three key voltage tests: resting voltage, cranking test, and charging system test. Each one provides valuable insights into your battery’s condition.
To test the resting voltage, let your car sit unused for at least an hour. Set your multimeter to 20V DC, then connect the red probe to the positive terminal and the black probe to the negative terminal.
"A healthy car battery should register about 12.6 volts. It’s important that you test the battery after it’s been sitting for at least an hour, to get what’s called the ‘resting voltage’." – Haynes Manuals
A fully charged battery will show 12.66 volts or higher. If it reads 12.2 volts, it’s only 50% charged, and anything below 12 volts means the battery is discharged and needs immediate attention.
The cranking test measures how your battery performs under load. Have someone turn the ignition for no more than 15 seconds while you monitor the multimeter. If the voltage drops below 9.6 volts, your battery is weak and likely needs replacing.
Lastly, the charging system test checks your alternator’s performance. With the engine running, a healthy system should read between 13.8 and 14.4 volts. If the reading falls outside this range, your alternator or charging system may need professional inspection.
| Test Type | Ideal Reading | What It Means |
|---|---|---|
| Resting voltage | 12.6V+ | Fully charged battery |
| 50% charged | 12.2V | Needs charging |
| Discharged | Below 12V | Immediate attention needed |
| Cranking test | Above 9.6V | Battery can handle load |
| Charging system | 13.8V-14.4V | Alternator working properly |
Battery age is another factor to consider. Most car batteries last three to five years. If your battery is over three years old and needs frequent jump-starts, it’s time to replace it.
"Noticing the signs of a dying battery early can save you from the frustration of being stranded or dealing with unexpected breakdowns." – Apex Automotive
Uganda’s varying temperatures – whether scorching heat or cooler conditions – can shorten your battery’s lifespan. That’s why regular testing is so important to keep your car running smoothly.
5. Coolant and Other Fluid Levels
Your car relies on several key fluids to keep everything running smoothly. In Uganda, where the weather can range from intense heat to heavy rains, these fluids play a critical role in protecting your engine and other essential systems. Regularly checking these fluids is a simple but important step to maintain performance and avoid breakdowns. Think of it as part of your monthly maintenance routine to keep your vehicle in top shape, no matter the conditions.
These fluids are like your car’s lifeblood – each one is essential for keeping critical systems, such as engine cooling and braking, functioning as they should.
Important Fluids to Check Monthly
- Coolant: Check the coolant level in the reservoir when the engine is cool. It should stay between the "F" (Full) and "L" (Low) marks. Always wait at least 30 minutes after driving before checking. If the level is below "L", top it off with the type specified in your owner’s manual.
- Also, inspect the coolant’s appearance. Normal coolant is typically red, blue, yellow, or green. If it looks colorless, rusty, has particles, or appears oily, it’s time for a professional inspection.
- Brake Fluid: Look at the brake fluid reservoir to ensure the level is between the minimum and maximum lines. Brake fluid should be clear or light yellow. If you suspect a leak, stop driving immediately and have the brakes inspected.
- Power Steering Fluid: Check that the fluid level matches the markings on its reservoir. Low levels can make steering harder and compromise safety.
- Transmission Fluid: When the engine is warm, inspect the transmission fluid. It’s usually red and helps ensure smooth gear shifts. If it looks brown or smells burnt, it may need replacing.
- Windshield Washer Fluid: Don’t forget this one! Keeping the washer fluid reservoir full is essential for maintaining clear visibility, especially during rainy weather.
Here’s a quick reference table for fluid checks:
| Fluid Type | When to Check | Normal Color | Warning Signs |
|---|---|---|---|
| Coolant | Engine cool | Red, blue, yellow, or green | Colorless, rusty, or particles |
| Brake Fluid | Engine off | Clear or light yellow | Dark or contaminated |
| Power Steering Fluid | Engine off | Usually red or pink | Dark, burnt smell |
| Transmission Fluid | Engine warm | Red | Brown or burnt odor |
| Washer Fluid | Anytime | Typically blue or green | Low or empty reservoir |
Finding Leaks or Low Levels
After checking fluid levels, take a moment to inspect for leaks. Catching leaks early can save you from costly repairs and inconvenient breakdowns. A simple way to check is by placing white cardboard under your car overnight. Any drips can help you identify the fluid type and its source.
Each fluid has unique characteristics. For example:
- Engine oil: Light amber or brownish-yellow with a slick texture.
- Coolant: Often has a sweet smell and comes in bright colors like green or red.
- Water-like liquid: Likely just condensation from the air conditioning or exhaust system, as noted by RAC Drive research in July 2025.
If you notice a significant leak, it’s best to consult a mechanic. For coolant leaks, clean up spills carefully – coolant is toxic and should be kept away from pets and children.
When topping off fluids, always use the type specified in your owner’s manual. Coolants, for instance, come in different formulations (like IAT, OAT, and HOAT), and using the wrong one can seriously damage your engine. Avoid overfilling and make sure all caps are securely tightened after refilling.
Taking a few minutes each month to check your car’s fluids can save you from unexpected repairs and keep you safe on the road. It’s an easy habit that pays off in the long run.
sbb-itb-7bab64a
6. Lights and Indicators
Once you’ve ensured your engine, tires, brakes, and battery are in great shape, it’s time to turn your attention to your car’s lights and indicators. These components are essential for safe driving and staying on the right side of the law.
Lights play a critical role in visibility, especially in areas with challenging conditions. Checking them monthly can help you catch burned-out bulbs and stay safe on the road. In places like Kampala, where theft of indicator bulbs and side mirrors is fairly common, regular inspections can also alert you to missing parts.
Checking All Lights and Bulbs
Inspecting your lights is a quick and simple process. Start by parking your car about 10 feet from a wall or other vertical surface. Turn on your headlights, high beams, daytime running lights, and front turn signals. For the rear lights, back up 10 feet against the same surface and press the brake pedal to check your taillights and brake lights. Once a month, take a walk around your car with all the lights switched on to inspect the front parking lights, side marker lights, backup lights, and license plate lights. Alternatively, a reflective surface can help you verify the performance of your lights [75–77].
Make sure all the key lights – headlights, brake lights, turn signals, interior lights, and daytime running lights – are functioning properly. If you notice any issues, replace the bulbs immediately.
Changing Broken Bulbs
Replacing a burned-out bulb is a task most car owners can handle with a bit of effort. For instance, swapping out a turn signal bulb is straightforward for a DIY enthusiast. You’ll need a screwdriver, pliers, a trim stick, and the correct replacement bulb as specified in your car’s manual.
To stay safe, disconnect the battery before starting. The steps for bulb replacement vary by car model, but generally, you’ll need to access the bulb through the engine compartment or wheel well, remove any covers or trim pieces, disconnect the wiring from the old bulb, and then take it out. For older-style round bulbs, gently push and twist the bulb to release it.
"For halogen bulbs, release the rear clips, withdraw the bulb, disconnect the wiring, attach the new bulb, and reverse the process." – Roger Fentiman, Doing lighting for 50 years
When handling new bulbs, especially halogen ones, avoid touching the glass with your bare hands. Use clean disposable rubber or white cotton gloves to prevent fingerprints, which can cause the bulb to fail prematurely.
Once the new bulb is in place, reconnect the wiring and ensure all connections are secure. Reinstall any covers or trim pieces, reconnect the battery, and test the bulb to confirm it’s working. If it doesn’t light up, double-check the wiring and installation – loose connections are often the culprit. Also, address any moisture inside the lens housing to avoid future problems.
"Replacing headlight bulbs is easy if you have instructions." – Charley B, DIY auto repair and maintenance
Keeping your car’s lights in good condition isn’t just about avoiding traffic tickets – it’s about ensuring your safety and that of other drivers. Regular checks and timely bulb replacements will keep your vehicle visible and safe on the road.
7. Engine Air Filter
Just like keeping an eye on your car’s fluid levels and brakes, checking your engine air filter every month plays a big role in maintaining your vehicle’s performance. This small but essential part ensures your engine gets the right amount of clean air it needs to function efficiently. A clean air filter helps with better fuel efficiency and keeps your engine running smoothly, while a clogged one can hurt gas mileage and reduce power.
Engines rely on a precise air-to-fuel ratio to perform efficiently – most vehicles require 14.7 parts of air for every 1 part of fuel. When the air filter gets clogged with dirt and debris, it limits airflow. This forces the engine to work harder, burning more fuel and potentially causing sluggish acceleration.
"When the engine has a full supply of clean air, the engine can better use the fuel it burns for power production." – AutoZone
Replacing a clogged air filter can boost your car’s fuel efficiency by up to 10%.
Checking for Dirt and Blockage
To inspect your air filter, locate the air filter housing – this is usually a rectangular or circular plastic container near the front of the engine. Open it using a screwdriver or latch, and carefully remove the filter, keeping track of its orientation.
Hold the filter up to a light source. If very little or no light passes through, it’s time for a replacement. A clean air filter is typically white or off-white, while a dirty one will appear darker, with visible dirt and debris in the pleats. If the filter is only lightly soiled, you might be able to tap it gently to remove loose debris. However, if it’s heavily clogged, replacing it is the best option.
How Often to Replace the Air Filter
You should replace the air filter whenever it looks dirty. Generally, air filters need replacing every 30,000–45,000 miles, but this can vary based on driving conditions. If you frequently drive in heavy traffic, hot climates, or on dusty, unpaved roads, you might need to replace it more often.
Make it a habit to check your air filter monthly. If you notice some debris but it still looks relatively clean, a quick shake might suffice. During routine maintenance, like oil changes, it’s also a great time to inspect the air filter. Some experts recommend replacing it every 12 months, or even pulling it out every 3–6 months to clear out debris if it’s visibly dirty.
Pay attention to signs that your air filter might be affecting your car’s performance. A dirty filter can lead to reduced fuel efficiency, sluggish engine performance, odd engine noises, or even trigger the check engine light. Smoke, a fuel odor, or slow acceleration are also red flags that it’s time for a closer look.
8. Windshield Wipers and Washer Fluid
After checking the engine air filter, lights, and battery, it’s time to turn your attention to your windshield wipers and washer fluid. These components are crucial for maintaining clear visibility, especially in Uganda’s rainy and dusty conditions. Together, they ensure your view stays unobstructed, keeping you safe on the road.
Windshield wipers generally last between 6–12 months. However, extreme conditions like intense sunlight and dust can shorten their lifespan. Prolonged UV exposure, for instance, can dry out the rubber, leading to faster wear and tear. Regularly inspecting and maintaining your wipers and washer fluid is key to safe driving.
Checking Wiper Blades
Inspect your wiper blades by lifting them off the windshield and looking for the following signs:
- Streaking: Leaves behind lines or smears on the glass [93, 94].
- Skipping: Fails to make consistent contact with the windshield.
- Squeaking: Produces noise due to uneven or rough movement [93, 94].
- Splitting: Shows cracks, splits, or brittle edges on the rubber [93, 94].
"Replacing your old wiper blades is essential as they become less effective and even lead to windshield damage." – AIS Windshield Experts
Even if your wipers seem functional, replacing them every 12 months is a good precautionary measure [93, 94]. To keep them in better shape, clean the blades regularly by wiping them with a damp cloth to remove dirt and debris. If you notice squeaking or reduced performance, inspect for grime buildup or damage. Also, clear away ice or snow from the windshield before using the wipers, as this can damage the blades. Replace them immediately if they show any performance issues.
Adding Washer Fluid
Once you’ve checked the wipers, take a moment to inspect the washer fluid reservoir. Keeping it filled is essential for dealing with unexpected rain or dusty roads. The reservoir is typically a clear or white plastic container with a cap marked by a windshield wiper symbol. Check the fluid level by either looking at the side of the container or removing the cap.
For Uganda’s driving conditions, all-season washer fluid is a reliable choice to handle dirt, grime, and insect debris. During warmer months, when insects are more common, consider using a bug-removal washer fluid designed for tougher residues like bug splatter [99, 100]. If you’re using concentrated washer fluid, make sure to dilute it with water according to the manufacturer’s instructions [99, 100]. Use a funnel when refilling to avoid spilling, and fill the reservoir completely.
Signs that your washer fluid needs refilling include a dashboard warning light, reduced spray, or visibly low levels during inspection. Running out during a dusty drive or sudden rainstorm can be risky, so keep the reservoir topped up. Test the washer system monthly to ensure proper spray coverage and streak-free wiping.
9. Belts and Hoses
After checking your lights and wipers, shift your attention to the belts and hoses to round out your monthly vehicle inspection. Regularly examining these components isn’t just about staying proactive – it’s about avoiding sudden breakdowns and expensive engine repairs. Belts and hoses are essential for keeping systems like the alternator, water pump, and air conditioning running smoothly. Meanwhile, hoses carry critical fluids throughout the engine. In Uganda’s hot climate and dusty roads, these parts endure extra strain, which can lead to faster wear and tear.
Belts usually last between 60,000 and 100,000 miles, while hoses should ideally be replaced every four years. However, harsh driving conditions can speed up their deterioration, making monthly checks crucial to keeping your vehicle in good shape.
Spotting Wear and Damage
Start your inspection when the engine is cool. Pop the hood and locate the serpentine belt and the various hoses connected to your engine.
For belts, keep an eye out for signs of trouble like cracks, fraying, splits, or a shiny, polished look on the surface. Twist the belt gently to check its underside for early signs of wear. If you notice chunks missing or deep cracks underneath, it’s time to replace the belt.
When inspecting hoses, give each one a squeeze. A healthy hose feels firm but flexible, while a soft or mushy texture can signal deterioration. Watch for bulges, cracks – especially near bends and connectors – or signs of fluid leaks. Pay close attention to the area around hose clamps, checking for rust or looseness. If you spot coolant residue in the engine bay, it could mean a leak.
Replacing Worn Parts
Certain warning signs – like a high-pitched squeal, engine overheating, difficulty steering, or fluid puddles under your car – may indicate that a belt or hose is failing and needs immediate attention. Fixing these issues early is far cheaper than dealing with the damage caused by a complete failure.
When replacing belts or hoses, always choose high-quality parts that match your vehicle’s specifications. While visual inspections are easy to do yourself, replacing these parts often requires special tools and precise tension adjustments. If you’re unsure about tackling it on your own, it’s wise to consult a professional mechanic.
Keep a record of every inspection and replacement to monitor the condition of these components over time. Regular checks – every 3,000 miles or during oil changes – can help you catch small problems before they turn into major headaches. This simple habit can save you from costly roadside breakdowns.
10. Cleaning and Interior Care
Once you’ve finished the mechanical checks, shift your attention to cleaning – an essential step in keeping your vehicle in great shape. Regular cleaning not only improves your car’s appearance but also helps you spot potential issues like paint damage, worn upholstery, or fluid leaks. Plus, a clean car retains its value better over time.
In Uganda’s dusty environment, keeping your car clean is even more critical. Dust and mud can clog air filters and speed up the corrosion of metal parts if left unchecked.
Washing the Outside
Uganda’s dusty roads and strong sunlight make frequent car washes a must. Aim to wash your car at least twice a month – or more often if you drive on unpaved roads or during the rainy season when mud accumulates quickly.
Start by rinsing off loose dirt, then use a pH-balanced soap and a microfiber mitt to wash the car. Work from the top down and rinse the mitt often to avoid scratching the paint. After washing, dry the car immediately with a clean microfiber towel to prevent water spots caused by mineral deposits.
For added protection, apply a coat of wax or paint sealant every three to six months. This helps shield your car from UV rays, dust, and other environmental elements. As you clean, check for paint chips, scratches, rust spots, or misaligned panels. Don’t forget to look underneath for leaks or loose parts.
Cleaning the Inside
How often you clean your car’s interior depends on how you use it, but a monthly routine is a good starting point. Vacuum the seats, carpets, and hard-to-reach areas with a crevice tool. Use microfiber cloths to wipe down surfaces, as they leave a streak-free finish.
For deeper cleaning, use high-quality interior cleaners and wipes designed for cars. Pay attention to spills – clean them up immediately, especially if you often travel with kids or pets.
While cleaning, check your car’s electronics to ensure everything is working properly. Inspect the upholstery for tears, excessive wear, or water damage, and be alert for musty odors, which could indicate moisture problems or even electrical issues.
Regular interior cleaning does more than keep your car looking good. It helps eliminate allergens and bacteria, preserves upholstery, and protects your car’s resale value. While monthly DIY cleaning covers the basics, consider professional detailing once or twice a year for deep cleaning and stain removal that you can’t achieve on your own.
Keeping a small cleaning kit in your car – complete with microfiber cloths, wipes, and a portable vacuum – makes it easy to tackle spills or messes as they happen. By maintaining both the exterior and interior, you’ll keep your car in top condition month after month.
Conclusion
Taking care of your car with monthly maintenance is more than just a good habit – it’s a way to protect your investment and ensure your safety on Uganda’s tough roads.
The numbers speak for themselves: neglecting maintenance costs over $2 billion annually, while regular upkeep costs just $0.09 per mile compared to $0.42 per mile for repairs. In Uganda, where a breakdown can leave you stranded miles from help, these figures become even more pressing.
"The cheapest maintenance is the maintenance you do before problems occur. A small investment of time and attention now can save thousands in repairs later."
– Rent A Driver Uganda
Robert Kawooya, a mechanic in Ntinda, explains the domino effect of neglect:
"A breakdown in one system eventually leads to breakdown in another connected system that was previously working."
For example, ignoring a failing water pump might cost you Shs100,000 to replace initially, but if left unchecked, it could cause overheating and damage to other parts, escalating the cost to seven times more.
Simple steps like keeping your tires properly inflated and ensuring your air filters are clean can make a big difference. These actions can improve fuel economy by up to 3% and 10%, respectively. With fuel prices rising, these small adjustments can lead to noticeable savings over time.
Above all, regular maintenance is about safety. As EMMY ODOCH reminds us:
"We only have one life to live", rings true when it comes to road safety. Prioritizing vehicle maintenance and practicing responsible driving is crucial for preventing accidents and safeguarding lives.
Well-maintained vehicles can last more than 200,000 miles, while neglected ones often fall short. By setting aside just 30 minutes each month to check essentials like engine oil, tire pressure, and brakes, you’re establishing habits that will keep your car dependable for years to come. Start small, focus on the critical components, and work your way through the full checklist until it becomes second nature.
FAQs
How often should I change my car’s air filter in Uganda’s dusty driving conditions?
Driving through Uganda’s dusty roads can take a toll on your car’s air filter, causing it to clog faster than usual. To keep things running smoothly, it’s recommended to change the air filter every 10,000 to 15,000 miles or roughly once a year, depending on which comes first. However, if you often find yourself driving on unpaved or dusty paths, it’s smart to check the filter more frequently and replace it whenever necessary. This simple step ensures your engine performs at its best and maximizes fuel efficiency.
A clean air filter acts as a shield for your engine, blocking dust and debris from causing damage. Regular inspections and timely replacements go a long way in keeping your car in top shape for the long haul.
What are the warning signs that my car battery might need to be replaced?
There are a few telltale signs that your car battery might be on its last legs. One of the most noticeable is trouble starting the engine – this could mean slow cranking or needing multiple tries to get the car running. Another red flag is dimming headlights or flickering interior lights, especially when you’re using other electrical features like the air conditioning or radio.
You might also spot dashboard warning lights, such as the battery or check engine icon, popping up. Additionally, electrical issues like sluggish power windows or locks can point to a weakening battery. If your battery is between 3 and 5 years old, it’s smart to get it tested regularly so you’re not caught off guard by a sudden failure.
What are the warning signs of brake problems, and how can I address them before they get worse?
When it comes to your brakes, don’t ignore warning signs like squealing or grinding noises, a soft or spongy brake pedal, vibrations while braking, or a dashboard brake warning light. These symptoms might point to problems such as worn brake pads, air in the brake lines, or leaking brake fluid.
To keep things in check, make it a habit to inspect your brake pads and replace them if they’re worn down. If you suspect air in the brake lines, bleeding them can help restore proper function. Also, keep an eye out for fluid leaks or any damaged components that might need attention. Tackling these issues early can save you from expensive repairs and ensure your car stays safe on the road.
Related posts
- 8 Essential Car Maintenance Tips for Uganda’s Climate
- Common Car Problems in Uganda: Solutions Guide
- How to Save Money on Used Car Maintenance
- Car maintenance costs in Uganda


